Bourbon Marinated Pork Tenderloin with Mango-Ginger Chutney and Yeast Rolls

Continuing with the Holiday Cocktail Party menu, here’s an easy one. This pork tenderloin is great as a heavy hors d’oeuvres or as a main, and it’s super easy–I hate cooking meat, because I don’t know what I’m doing, but this is impossible to screw up if you have a meat thermometer. I scaled this up for about 50, but you can scale down easily.

Add some Trader Joe’s chutney and some yeast rolls, and you’re set!

Bourbon Pork Tenderloin

Bourbon Marinated Pork Tenderloin with Mango-Ginger Chutney and Yeast Rolls

  • 3 packages of pork tenderloins (2.5 lbs. each) for a total of 7-8 lbs. meat
  • 4 garlic cloves, minced or put through press
  • pepper
  • 1 C. bourbon
  • 1/2 C. soy sauce
  • 2 Tb. Dijon mustard
  • 1/4 C. olive oil
  • Trader Joe’s Mango-Ginger Chutney (or substitute any other chutney you like)
  • 1 package of 36 frozen rolls (I used Kroger brand–see here for example–baking these myself was much cheaper than buying lots of pre-cooked store rolls, but you could also go that route)
  • 2 Tb. butter

There is no science to the marinade, so go with your gut on it. Separate the pork tenderloins and put 3 tenderloins in each of 2 plastic gallon bags (you’ll have 6 tenderloins total). Whisk together the bourbon, soy, mustard, and olive oil and pour half into each bag. Marinate the meat overnight.

Generously butter several baking pans or pie pans and place individual pieces of frozen roll dough into them (space about 1″ apart). Let the rolls rise for 3-6 hours in a warm corner or in a warm but unheated oven.

Preheat the oven to 400 degrees. Line roasting pans or baking sheets with foil and place the tenderloins on them. Cook at 400 until the pork reaches 145 degrees and then tent it with foil (ours took about 20 minutes, but yours could be more or less). Turn down the oven to 350 degrees for the rolls. Let the meat rest at least 10 minutes before carving (preferably more).

While the meat is resting, melt the butter and brush the rolls with it. Bake the rolls at 350 degrees for about 20-25 minutes till golden brown.

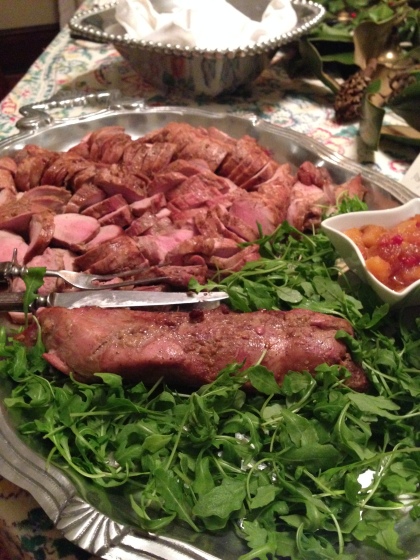
Serve meat with juices warm or at room temp with the chutney and the rolls on a platter garnished with arugula or other greens.
Ramp Risotto with Lemon, Peas, and Radishes

Ramp, or

Ramp, or “Wild Leek”, CC: Attribution-Share Alike 3.0 Unported, Courtesy Wikimedia.

We are almost there–T minus four days until move in and much of our big renovating will be done as of tomorrow. We will be living without kitchen counters for a couple of weeks once we move in, as well as without a stove and sink for a while, so this may well be the last blog post I write for a bit as I see Co-Op deli dinners and eating out in some of our future. But we’re excited to create this new home together, and hopefully to have all of you there eating meals around a table together in the near future!

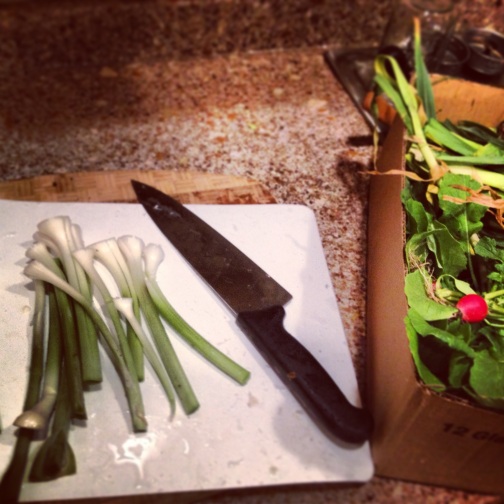
Today we were at the house after work checking out the kitchen progress. As always, I was wondering what I might be able to cook with little food in the cabinet, and most of our pots and pans packed away. A few days ago, while tilling our second raised bed, I pulled out what I assumed were irises so I could transplant them elsewhere, but quickly found that I’d pulled up some kind of onion. They looked like really large green onions, with a leek-like stem, and leaves like irises. They wer actually ramps.

Ramps are kind of an Appalachian thing–people down here eat them with beans and cornbread or sauteed with bacon grease. Now I’m wishing I didn’t pull all of them, because I should definitely plant some more for next season–apparently they’re actually a protected species in some places! Anyhow, with my surplus of ramps, and some radish plants still needing thinning, I figured I’d make some kind of risotto–my go to “everything but the kitchen sink” solution.

Ramps & Radishes

Ramps & Radishes

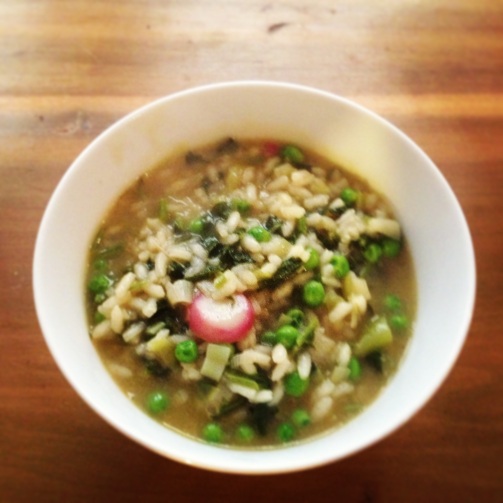
Of course, I realized once we were home that we didn’t have any white wine in the house, so I figured I’d try gin–why not, and the juniper/herbally flavors I thought might be nice with spring onions and radishes. We also didn’t have any cheese, which is all the better since I really shouldn’t eat it, so the key to cheeseless risotto is adding butter at the end–what the French call monter au beurre–in order to emulsify everything and give it some rich mouthfeel. Frozen peas (one of my favorite go to pantry items) and lemon juice rounded it out.

I’m excited to have put this together on a whim, and look forward to taking advantage of more Appalachian indigenous ingredients, like ramps. Enjoy!

Ramp Risotto

Ramp Risotto with Lemon, Peas, and Radishes

  • 1.5 C. Arborio rice
  • 5.5 C. veggie stock
  • 1/2 C. gin
  • 1 Tb. olive oil
  • 2 Tbs. butter, divided
  • 1 large bunch ramps
  • 1 large bunch of radish greens and baby radishes, chopped
  • 1/2 to 3/4 C. frozen peas
  • Zest and juice of one lemon

Heat the veggie stock in a large pot. In the meantime, heat the olive oil and 1 Tb. of the butter in a heavy pan over medium. Clean the leeks well of any dirt and chop off most of the green leaves. Cut off the bottoms, and similarly to leeks, peel off the outer layer and rinse well to get rid of dirt. Chop ramps fine. Saute the ramps in the olive oil and butter over medium until tender. Add the rice and stir, coating well, for 1 minute. Add the gin and stir until absorbed. Start adding in the stock, about a cup or so at a time. Simmer and stir, adding more until you’ve used a little more than half of the stock. Stir in the radishes and radish greens.

When you’ve added in your last ladle of stock, stir in the frozen peas and cook slowly till most of the stock is absorbed. Add in the lemon juice and zest and stir. Add in the remaining Tb. of butter and stir till melted. Serve hot with plenty of fresh ground black pepper. Serves 4-6.

The Best Pimento Cheese Ever…Seriously

Happy New Year everyone!

Other than eating too much, we had a wonderful holiday, but are now glad to be settled back down in Knoxville after lots of travel.

If you’ve ever visited my parents’ house in Kentucky, you’ll know that there’s always a big container of pimento cheese in the fridge. No matter what. And no matter how many times I say my lactose-intolerant self won’t take a bite, I always do, which is why I wanted to share this family favorite recipe with you all.

Pimento cheese has had an in-vogue moment again, at least here in Knoxville, along with deviled eggs, homemade pork rinds, and all kinds of other bad-for-you Southern food that trendy “locavore” restaurants here help eaters justify since the ingredients are easily sourced from nearby farms. I mean who can resist free-range deviled eggs with sriracha and homemade chowchow?

I’m glad Southerners are finding their groove and celebrating their food culture (even if it might give us all a heart attack). For one, it means that people are learning not to do sacreligious things, like pureeing one’s pimento cheese in the food processor, or God forbid, adding something sweet, like Miracle Whip, to it. Nevertheless, pimento cheese is one of those things you just don’t want to mess with. So, please don’t add jalapenos, or barrel-fermented organic pickles, or what have you to this. Just stick with the basics and keep it simple, simple, simple.

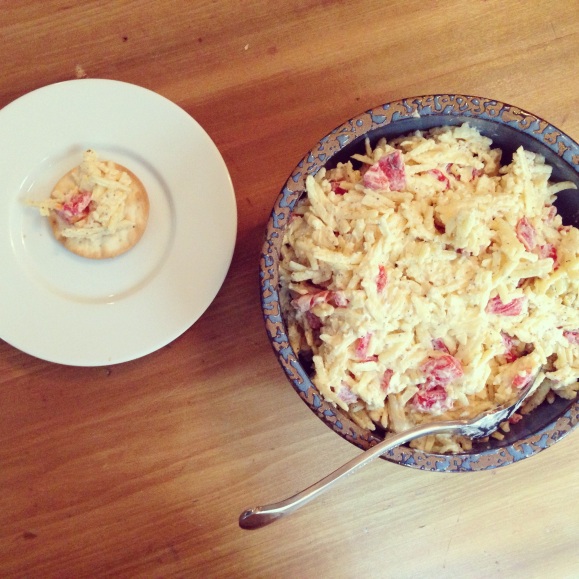
The trick here is to start with good ingredients, making sure to especially use good mayo (I always use Hellman’s) and good cheese (Cabot cheese is the best–I’m looking at you, Sara). My family always uses sharp white cheddar and roasted red peppers, which might sound kind of shishi, but fresh roasted peppers are a lot better than the little jars of pimentos that sit mouldering on the back shelf of your Piggly Wiggly (plus, you can’t even find pimentos usually up North or in Europe). The other trick is to absolutely not add too much mayo. The mayo should just barely bind everything together. Other than that, when serving it’s best with bland crackers. Saltines, water crackers, or Melba toast are all great options, but just make sure that your saltines aren’t fully salted, or the end product will be too much of a salt bomb.

Hope you enjoy!

Image

The Best Pimento Cheese Ever

  • 1 lb. or so sharp white cheddar cheese
  • 1 large roasted red pepper, diced
  • 1/4 C. or so mayonnaise (Hellman’s or similar suggested)
  • 1 Tb. grated yellow onion
  • lots of freshly ground black pepper

Grate the cheddar cheese using the grater fitting on your food processor, or by hand. Grate the onion and add to cheese, making sure to include any juice. Sprinkle in the diced roasted red pepper. Gently fold in the mayonnaise a bit at a time, adding more or less, just until the mixture binds together. Season with plenty of freshly ground black pepper. Chill and serve with bland crackers or make sandwiches (tomato is nice on a sandwich with pimento cheese).

PS- Big thanks to Rita and Mom for teaching me this recipe…

Cajun Skillet Beans from Summer Street

My cooking career in college encapsulated some highs and lows.  On a few golden occasions, I was able to improvise and throw ingredients together into dishes that were both magical and impossible to ever replicate (“Break Up Macaroni and Cheese” and “Everything But the Upstairs Kitchen Sink Chili” come to mind).  At other times, I undercooked potatoes in Potato Soup, failed to cook off the vodka in vodka sauce, and blew up one of my saucepans by forgetting about it on the stove on high heat.  High and lows, like I said.

Image

But one of the most enduring dishes from that period is Cajun Skillet Beans, a gem of a recipe from the cookbook Moosewood Cooks at Home.  Naomi and I made this during our sophomore year for a dinner party (N, you remember this?).  Four or five of us crowded around the tiny coffee table in our shoebox apartment on Summer Street to chow down on these spiced beans and veggies.  That was our first real apartment, our first real kitchen, and just the beginning of a long tradition of gathering our friends to eat food (in apartments of varying quality).   

I’ve held onto the cookbook, and this recipe in particular, in the ten years since.  I like it because it can be made out of pantry ingredients, it comes together quickly, and it has some interesting flavors.  Back in 2002 we paired it with Saffron Orzo, which was great, but saffron is pretty expensive so our more fiscally and nutritionally responsible 2012 selves can make it with BARLEY.

Cajun Skillet Beans

from the Moosewood Cooks at Home Cookbook

  • 1 medium size onion
  • 4 cloves garlic
  • 2 stalks of celery
  • 2 peppers (red or green)
  • 1 tsp dried oregano, thyme, and basil
  • pinch of cayenne and salt
  • 1 can (14.5 oz) of diced tomatoes
  • 1 tb dijon mustard
  • 1 tb honey mustard
  • 2 cans of black eyed peas

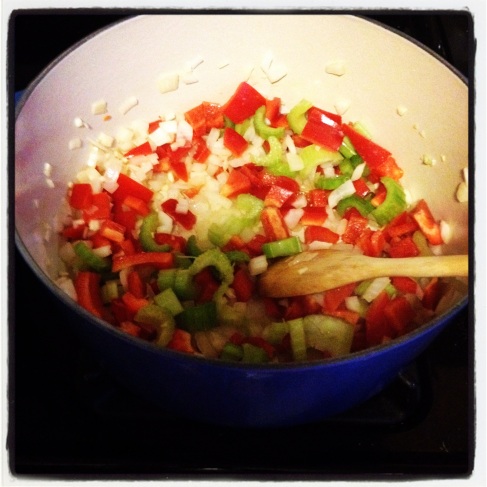
Like all so many great recipes, it starts with dicing the onion, mincing the garlic, and sauteeing them in oil over medium heat.  Chop the peppers and celery and add to the onion and garlic after about 5 minutes.

Image

After another 5 min, add the spices and stir. Cover the skillet or pot for a few more minutes so the onions get slightly golden.

Add the tomatoes, honey, and mustard.  Let simmer another 3-5 minutes.

Rinse the beans and add to the pot.  Stir and let cook an additional 10 minutes before serving.

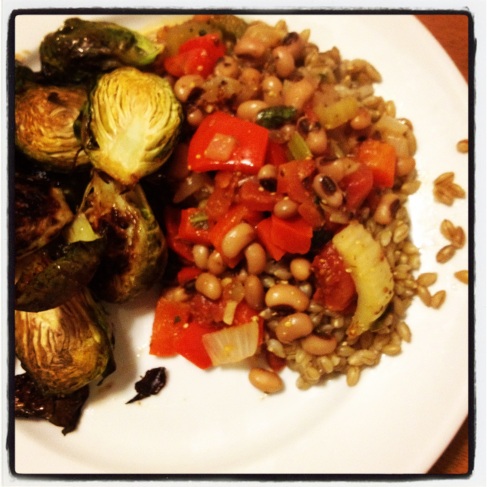
I cooked a cup of barley to go with and served with roasted Brussels sprouts.  Also, we’re on a perennial mission to find the best cheap red wines out there, and recently we’ve been trying a lot of blended wines because we’ve learned they can be a good bargain.  We tried this one last night with our skillet beans -it was about 10 bucks- and pronounced it delicious. 

Image


Jalapeno Cheddar Cornbread Does Mt. Washington!

I’ve been trying to get my friends in med school to do a chili cook off for a long time. We’re talking… 2+ years. As my birthday rolled around this year and we started talking about what to do (dinner out? beer garden? bowling??) we all agreed that given the utter insanity of this year and our very different schedules, an all-evening hang out at my house where everyone could trickle in as they pleased was in order. In the past these evenings have often motivated us to bring out the fancy in our cooking repertoires. This time though, we wanted to do something that wouldn’t involve too much time or money to prepare so we could maximize time spent sitting in clusters on the floor, with a beer in one hand and a cup ‘o something warm and home made in the other, listening to bluegrass and reminiscing about the gross and fascinating things we’d all seen during the week. Perfect opportunity for a chili cook off!

I personally provided some very well-received corn bread. (Not too hard to please with this much Cabot and a recipe stolen from Ina Garten.)

I doubled the recipe and saved half the batter to make another batch the next day. This one came up Mt. Washington with Chris and me. Actually, it was our breakfast, early snack, rapidly-eaten-(due to freezing fingers)-lunch/snack on the summit, and afternoon snack. Never let us down.

Ingredients

  • 3 cups all-purpose flour
  • 1 cup yellow cornmeal
  • 1/4 cup sugar (I used less)
  • 2 tablespoons baking powder
  • 2 teaspoons kosher salt
  • 2 cups milk
  • 3 extra-large eggs, lightly beaten
  • 1/2 pound (2 sticks) unsalted butter, melted, plus extra to grease the pan
  • 8 ounces aged extra-sharp [CABOT HUNTERS SERIOUSLY SHARP] Cheddar, grated, divided
  • 1/3 cup chopped scallions, white and green parts, plus extra for garnish, 3 scallions
  • 3 tablespoons seeded and minced fresh jalapeno peppers

Directions

Combine the flour, cornmeal, sugar, baking powder, and salt in a large bowl. In a separate bowl, combine the milk, eggs, and butter. With a wooden spoon, stir the wet ingredients into the dry until most of the lumps are dissolved. Don’t overmix! Mix in 2 cups of the grated Cheddar, the scallions and jalapenos, and allow the mixture to sit at room temperature for 20 minutes.

Meanwhile, preheat the oven to 350 degrees F. Grease a 9 by 13 by 2-inch baking pan.

Pour the batter into the prepared pan, smooth the top, and sprinkle with the remaining grated Cheddar and extra chopped scallions. Bake for 30 to 35 minutes, or until a toothpick comes out clean. Cool and cut into large squares. Serve warm or at room temperature.