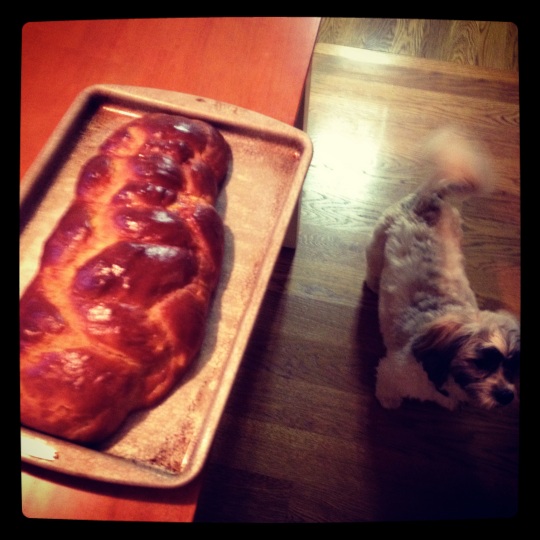
Challah (Shophie’s favorite)

Image

Well, this has been my most prolific season on the blog yet! 2 posts in 1 month! Phew! Now that I finally have a bit more free time its so wonderful to have time to both cook and post on the blog. I’ve been in Seattle for the past 3 weeks and I have to say, this is a GREAT food city! Though I’ve been doing a lot of cooking at home and going to friends’ houses for meals, I have partaken in some amazing Ethiopian, Vietnamese, and Hawaiian foods, among others. I also recently discovered Yotam Ottolenghi’s new cookbook Jerusalem and am plotting some flagrant plagarism that will hopefully appear on the blog in the near future after Hanukkah or my birthday (hint hint mom!) Well, I could easily digress further, but I’m going to yoga soon… god its nice to have free time! So without further a do I bring you: Challah! I know, I’m really outdoing my Jew-ness lately. I will say that as a total, utter and complete non-baker, including non-bread maker, this was actually not that difficult. Enjoy!

Makes 2 challas

Ingredients:

1 1/2 packets yeast
1/2 cup sugar
1/2 cup vegetable oil, plus more for greasing the bowl
5 large eggs
1 tablespoon salt
8 1/2 cups all-purpose flour
1/2 cup raisins or chopped apple per challah

Image

1. Dissolve the yeast and 1 tbsp of the sugar in 1 3/4 cups warm water in a large bowl. Whisk the oil into the bowl, then whisk 4 eggs in one at a time, followed by the rest of the sugar and the salt. Add the flour a little bit at a time until the dough holds together.

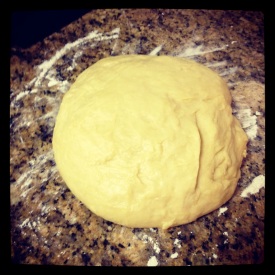
2. Turn the dough out onto a floured surface and knead until it is smooth and uniform. Put it into a large oiled bowl, cover, and let it rise in a warm spot for 1 hour. Punch it down, cover it again, and let it rise for another half an hour.

3. Knead in the apple or raisins if you are using them at this point.

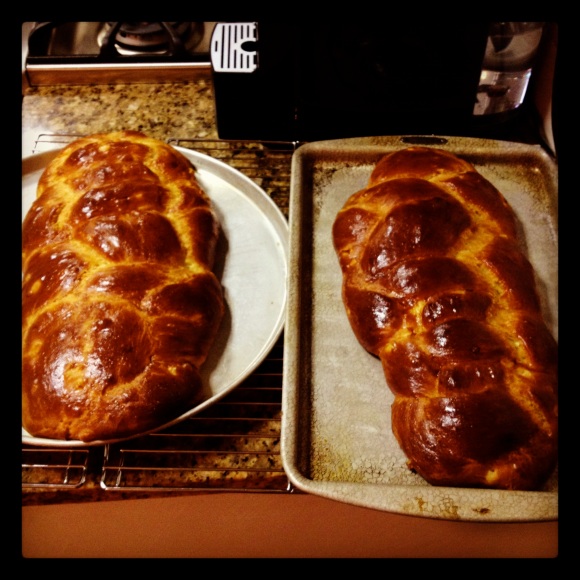
4. Time to braid! Divide to dough into 2 to make 2 loaves. With each ball, divide into 4 smaller balls and roll them out into ~1.5-2 in strands. Press the ends of the 4 strands together and lay them out straight. Rather than explain in detail how to braid with 4, just take a look at this video: http://www.youtube.com/watch?v=4TOKt18P7z4. Its not exactly how I personally did it, but it looks great and is easier than me trying to verbalize how to do it! Once braided I like to tuck the ends under for maximum attractiveness.

5. Turn on the oven to 375. Beat the 5th egg and paint the challas with it. Let them rise another hour at this point. (You can also freeze them before this final rising. If you do so, take them out of the freezer 5 hours before baking.)

6. Bake for 30-40 minutes until the tops are a nice golden brown. Yum!

It was most delicious for the first 24 hours, but will stay good for a few days if put in the fridge. Note: there is no french toast like challah french toast. Just saying.Image
Arepas

I’m a huge fan of all things corn: grits, corn on the cob, polenta, you name it. Maybe it’s my Southern heritage, but there’s something earthy, simple, and comforting about corn products (well, with the exception of corn syrup…).

Recently our friend Javier turned us on to homemade tortillas. I always thought that they would be impossible to make, but with a tortilla press, they really are quite easy, and he walked us through the process several times. Even so, I don’t always feel like dragging out the tortilla press, and I’m still working on making them the perfect thickness.

Last night, after much travel, I looked in our fridge and found there was little there. I managed to scrounge together a bean stew, but we both felt like something corny on the side, like cornbread. Unfortunately, a lack of milk and eggs made that impossible, but we did have some masa harina. I figured one of my favorite recipe search engines, foodily.com, could help me find something to make out of our lone bag of masa harina.

Fortunately, we were in luck–one of the first recipes that came up was for arepas–a Venezuelan sort of corn flatbread or thick tortilla. And the ingredients?: masa harina, water, and salt. How easy is that? I first came across arepas in college, when I lived in New York City for a term, not too far from Caracas Arepas Bar where they stuffed the corn circles with delicious meat and vegetarian fillings. They were cheap, nourishing, and delicious, so it was great to come across a recipe for them. We also don’t eat a lot of bread in the house, but I sometimes crave some vehicle for the many vegetarian bean dips or stews that we so often eat, and so these seemed liked a perfect thing to introduce into our repertoire.

Within about 15 minutes from start to finish, we had a plate full of hot arepas to accompany our bean stew. We had them plain, and for me, slathered with butter, but they would be great stuffed or topped with avocado and lime, ceviche, refried beans and toppings, or grilled meat or seafood. I was impressed at how quickly these came together and I think they will become a staple in our home.

Arepas

adapted from Big Girls Small Kitchen, makes 8 small arepas

  • 1 1/2 C. masa harina
  • 1 tsp. salt
  • about 1 1/3 C. water
  • oil or cooking spray

Using a fork or a whisk, combine the masa harina and salt well. Add in about 1 C. of the water to the masa harina and salt mixture and combine with hands. Add enough water until the dough comes together and is about the texture of playdough. Divide the dough in half, and divide each half into fourths, rolling them in your hands to make 8 little balls of dough. Flatten each of the 8 dough balls into flat discs. Heat a cast iron skillet on the stove and add a thin film of oil or cooking spray. When the pan is hot, add the dough discs in batches. Flatten the discs with a spatula. Cook over medium high for about 5 minutes on the first side, or until golden and with black spots across the bottom. Flip, flatten the discs again, and cook for about 5 minutes or until both sides are perfectly charred. Serve immediately while hot, or keep them warm in a warm oven.

Don’t keep the uncooked dough for too long before frying, as it will dry out and become crumbly quite easily. If you need to keep it after you make it, keep the dough balls in a bowl and cover with a damp kitchen towel. These should be about 1/2″ thick, but don’t make them much thicker, and remember to flatten them with a spatula so that they cook through. The outsides should be crispy with a tender, but not doughy, center.

Yummy Banana Bread

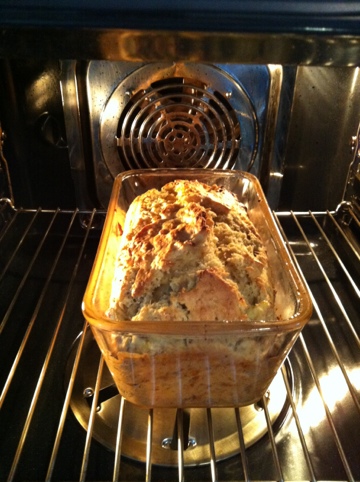
Although I am not a baker, Kileken loves banana bead and I hate throwing away old bananas, but there comes a certain juncture when they are too mushy and brown for my granola and yogurt breakfast-banana bread to the rescue. This is a recipe adapted from Cooks Illustrated. My Aunt gave me ten years of bound Cooks Illustrated and it’s fun to read since they actually describe the science of cooking. For example, take caution when mixing. If you stir to a smooth batter, the loaves turn out tough and small. Flour contains protein and when protein mixes with water, gluten develops. The more you stir/mix, the harder the loaves. My mom has first hand experience with this as she accidentally used a mixer. The other reason why I like this recipe is that it uses yogurt and I have found you can cut the amount of butter. The yogurt also creates a much softer and tastier bread than conventional recipes.

Ingredients
Wet Ingredients
– 3 very ripe darkly speckled bananas (1.5 cups)
– 1/2 cup of plain yogurt
– 2 large eggs beaten lightly
– 4 tablespoons of butter, melted and cooled
– 2 teaspoons of vanilla extract

Dry Ingredients
– 2 cups of all-purpose flour
– 1/2 cup of sugar
– 3/4 teaspoon baking soda

Optional:
– Chocolate chips
– Coconut flakes
– Nutmeg
– Orange Zest
– Walnuts

Directions
1. Heat oven to 350 degrees Fahrenheit
2. Grease loaf pan
3. Mix wet ingredients in a smaller bowl
4. Mix dry ingredients in a larger bowl
5. Lightly fold wet/banana mixture into dry mixture until thick and chunky. This is when you would add any of the optional ingredients.
6. Pour into loaf pan and wait 55 min or until golden brown/chopstick does not come out gooey when you poke the center
7. Enjoy!

20120302-090103.jpg

Jalapeno Cheddar Cornbread Does Mt. Washington!

I’ve been trying to get my friends in med school to do a chili cook off for a long time. We’re talking… 2+ years. As my birthday rolled around this year and we started talking about what to do (dinner out? beer garden? bowling??) we all agreed that given the utter insanity of this year and our very different schedules, an all-evening hang out at my house where everyone could trickle in as they pleased was in order. In the past these evenings have often motivated us to bring out the fancy in our cooking repertoires. This time though, we wanted to do something that wouldn’t involve too much time or money to prepare so we could maximize time spent sitting in clusters on the floor, with a beer in one hand and a cup ‘o something warm and home made in the other, listening to bluegrass and reminiscing about the gross and fascinating things we’d all seen during the week. Perfect opportunity for a chili cook off!

I personally provided some very well-received corn bread. (Not too hard to please with this much Cabot and a recipe stolen from Ina Garten.)

I doubled the recipe and saved half the batter to make another batch the next day. This one came up Mt. Washington with Chris and me. Actually, it was our breakfast, early snack, rapidly-eaten-(due to freezing fingers)-lunch/snack on the summit, and afternoon snack. Never let us down.

Ingredients

  • 3 cups all-purpose flour
  • 1 cup yellow cornmeal
  • 1/4 cup sugar (I used less)
  • 2 tablespoons baking powder
  • 2 teaspoons kosher salt
  • 2 cups milk
  • 3 extra-large eggs, lightly beaten
  • 1/2 pound (2 sticks) unsalted butter, melted, plus extra to grease the pan
  • 8 ounces aged extra-sharp [CABOT HUNTERS SERIOUSLY SHARP] Cheddar, grated, divided
  • 1/3 cup chopped scallions, white and green parts, plus extra for garnish, 3 scallions
  • 3 tablespoons seeded and minced fresh jalapeno peppers

Directions

Combine the flour, cornmeal, sugar, baking powder, and salt in a large bowl. In a separate bowl, combine the milk, eggs, and butter. With a wooden spoon, stir the wet ingredients into the dry until most of the lumps are dissolved. Don’t overmix! Mix in 2 cups of the grated Cheddar, the scallions and jalapenos, and allow the mixture to sit at room temperature for 20 minutes.

Meanwhile, preheat the oven to 350 degrees F. Grease a 9 by 13 by 2-inch baking pan.

Pour the batter into the prepared pan, smooth the top, and sprinkle with the remaining grated Cheddar and extra chopped scallions. Bake for 30 to 35 minutes, or until a toothpick comes out clean. Cool and cut into large squares. Serve warm or at room temperature.