Quinoa Black Bean Salad with Chipotle-Tahini Dressing

Wow! Has it really been three months since we’ve posted on here? As everyone else jaunts off on world travels and family trips, we are here, waiting for our little boy to arrive. (It’s so weird to write that still!)

C&Gmaternity-69

A photo by our amazing friend Kelli, of Kelli-GO Photo, at 33 weeks.

I’m 38 weeks today, and expect him to come anytime from any day now to four weeks from now. This waiting time is kind of weird: we’re two, we’re about to be three, and we know that our lives are about to be irrevocably changed forever. What now is a series of kicks and pushes, and imaginations will all of a sudden be real, without pause, without a chance to absorb it all. We’ll just be thrown into it. But we’re excited–beyond, excited really–to see what this creature is like, what he becomes, and what we’ll learn from him. What an adventure.

Have I mentioned our friends are amazing? Courtesy of Kelli-GO Photo.

Have I mentioned our friends are amazing? Courtesy of Kelli-GO Photo.

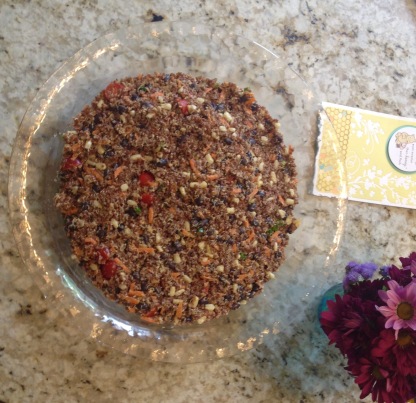
We’ve felt so loved and supported, by you all, by our amazing friends–from two amazing baby showers, to the advice, porch sitting, emails, and calls–we feel so, so lucky to be bringing a child into this particular community. And while we wait, we’ve been in major nesting mode–tearing down a pergola, painting the house, setting up the nursery, and cooking tons of food for the freezer. We’ve also inexplicably signed ourselves up for lots and lots of social outings, which inevitably also come with the end of the school year and the beginning of Spring, so I decided to write up this quinoa salad recipe, of which there are a million variations, just because it’s easy and good, and it was the only way I’d have a recipe with an actual photo to post here! I added the chipotle last minute, as I thought it needed a little kick, but of course, you can leave it out, and/or add feta or any number of different veggies or types of beans to the mix. It serves a ton of people, is great for lunch or a picnic, and is healthy.

Enjoy! And I’ll keep you all posted if you keep me posted! xoxo

FullSizeRender (3)

Quinoa Black Bean Salad with Chipotle-Tahini Dressing

  • 2 C. white or red quinoa
  • 1/4 C. olive oil
  • 1.5 C. frozen white sweet corn, or fresh corn off the cob
  • 3 C. (or about 2 cans) cooked black beans
  • 3 carrots, grated
  • 4 green onions, chopped
  • 1 pint cherry tomatoes, halved
  • 1/4 C. tahini
  • ~1/4 C. or so apple cider vinegar or lime juice
  • water
  • salt and pepper
  • 2 tsp. ground chipotle chile powder
  • Optional: small bunch of cilantro or chives, chopped

Cook the quinoa in lots of salted water for ~15 minutes, or until done. Drain and toss with olive oil plus a splash of cider vinegar or lime juice. While quinoa is still hot, toss with the frozen or fresh corn. When it cools down to room temperature, add in the black beans, carrot, green onions, and tomatoes.

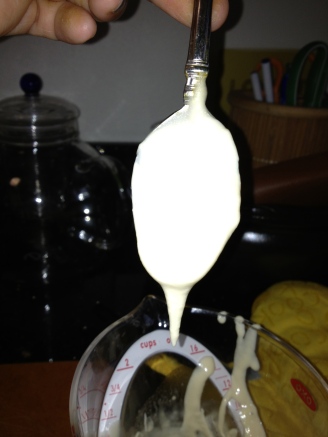
Stir the tahini and the vinegar or lime juice together until the tahini breaks down into a thick white paste. Add the chipotle, salt to taste, and enough water to make it dressing consistency. Taste and add more vinegar, water, or salt to taste. Toss the quinoa mixture with the dressing, adding extra olive oil or vinegar if it seems too dry. Top with the optional cilantro or chives, if desired. Serve at room temperature or chilled.
Holiday Cocktail Party for (almost) 50

New Year's Tree

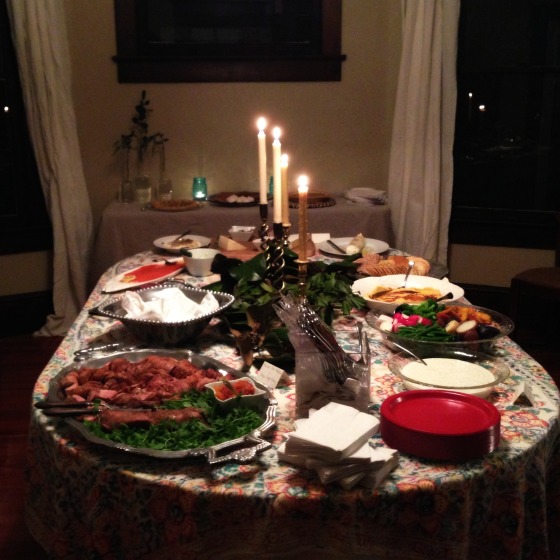
Last night we were excited to host our first big party at our house, and I promised Sara that I’d share the menu. It’s the first time I’ve hosted that many people (almost 50), and I have to say, we had a blast.

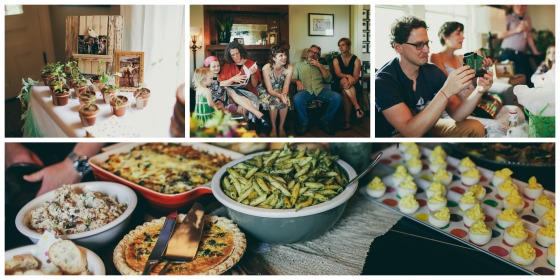
Artful arrangementWe spent a few nights slowly wrapping presents and decorating the tree and the mantels with holly, magnolia leaves, and hemlock branches from Mom & Dad’s yard, and we especially enjoyed these gorgeous red and white tulips, courtesy of Ryan and Sara. I never buy fresh flowers for the house and so they were such a treat.

The TableWe forgot to take pictures during the party, as we were busy filling drinks and socializing, but it reminded us of how many lovely people we’ve met in Knoxville, and how we’ve really started to make our home here. The only thing missing? My BFFs. I sure do wish we could’ve had you all there–I miss you guys, especially around the holidays.

I put some thought into making the menu budget-conscious and as easy as possible, so I’ll share below in case it helps anyone plan a big cocktail party in the future! I’ll post the recipes separately and link to them so they’re more easily searchable. Truly, you can spend a lot of time arranging items on a table, but none of these recipes took very much time, most of them could be made ahead, and you could take some additional shortcuts (buy already-baked rolls; store-bought hummus; etc.).

Happy holidays to everyone!

Cocktail Party Menu for 50

Coconut Mashed Sweet Potatoes

Lane's End Horse Farm, Courtesy of my sister-in-law, Liz.

Lane’s End Horse Farm, Courtesy of my sister-in-law, Liz.

Happy belated Thanksgiving everyone! We had a great trip to Kentucky with the whole family, including my future sister-in-law Ana Carolina, and her parents, fresh in from Colombia. It was a hectic, but great holiday with tons of family packed in the house–we went on a horse farm tour, had a wonderful Thanksgiving dinner at my aunt’s, and had a lovely afternoon out at my Uncle David and Aunt Leigh’s farm hangout, “Camp David.” In addition to roasting marshmallows and cooking soup over an open fire out at the farm, we salvaged old barn wood for a new coffee table, picked lots of fun greenery for winter decorating, and enjoyed the sunshine. My generous aunt and uncle sent us home with a homemade tobacco stick Christmas tree (also barn salvaged) for our front porch, and more butternut squash, sweet potatoes, and icicle radishes than could fit in our fridge.

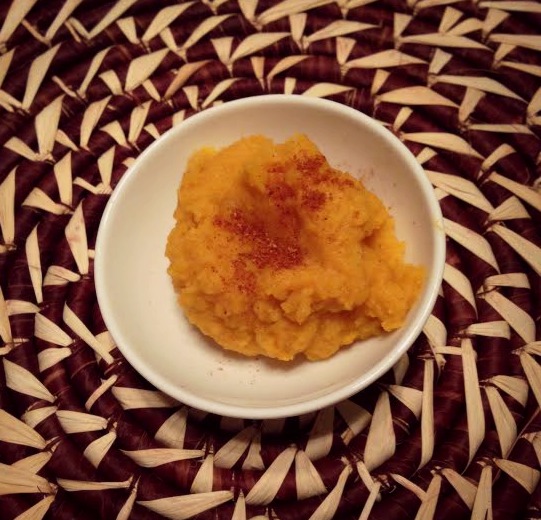
The farm bounty inspired me to make a recipe I’ve made a few times now–so simple, it really doesn’t really warrant a recipe, but I made it recently and folks liked it, so why not? Mashed sweet potatoes are really amazing made with coconut oil instead of butter. Tonight I added some garam masala for fun, but don’t worry about adding it if you’re not feeling it. That’s the gist, and here it goes.

Mashed Sweet Potatoes on a gorgeous handmade Colombian trivet from  future inlaws, the Gomez Bridge family.

Mashed Sweet Potatoes on a gorgeous handmade Colombian trivet from future inlaws, the Gomez Bridge family.

Coconut Mashed Sweet Potatoes

  • 4 large sweet potatoes, peeled and cubed
  • 1 Tb. or more coconut oil
  • 1 Tb. olive oil
  • potato cooking water 
  • salt and pepper
  • Optional: garam masala and a squeeze of lime

Boil a large pot of water and add plenty of salt. Add potatoes and cook till tender. Save at least a 1/4 cup of the cooking water when the potatoes are done in a bowl on the side. Mash the sweet potatoes with a potato masher or by putting them through a ricer. Add the oils while hot, and add enough cooking water to whip them up in a nice texture. Add salt and pepper to taste. Add garam masala if desired and taste for spice. Serve hot with a squeeze of lime if desired.

Roast Squash and Onion with Tahini Sauce and Za’atar

Image

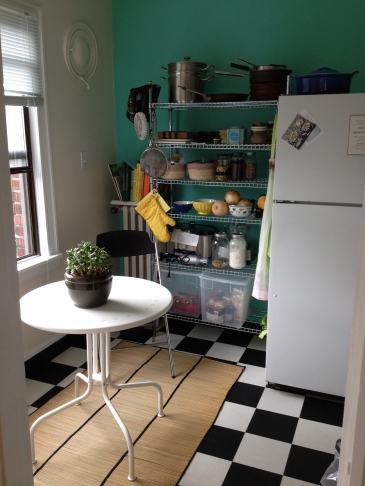
Life in Seattle continues with an amazing amount of warmth, sun, and happy people enjoying themselves outdoors. Just for an example of how great Seattle is in the summer, I share with you my plans for the next 24 hours: Capitol Hill (my ‘hood) street food festival, then watching the Goonies in a public park with some lady friends, then tomorrow hiking to Blanca Lake. For the last few weeks I’ve been on a much easier schedule, with time to go to LA for the weekend for Natalie’s beautiful wedding, cook most nights, run, hike, climb, and enjoy my new (and currently a bit messy) apartment!

Image

ImageImage

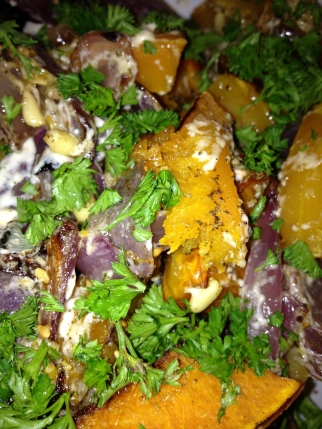
To continue with my Middle Eastern theme on this blog, I’m posting this recipe that is flagrantly plagiarized from Yotam Ottolenghi and Sami Tamimi’s book Jerusalem. Aya gave me this last year, and I love it! The recipes are all unique and amazing but not too complicated, and the book is full of lovely stories about the foods that brought their families and communities together growing up in West and East Jerusalem. This book is in fact so special that one of the NYT food editors recently published an article about it, asking readers to post their favorite recipes from the book: http://dinersjournal.blogs.nytimes.com/2013/07/08/jerusalem-fans-whats-your-favorite-recipe-from-the-book/?_r=0. Everyone seems to have a different favorite. I think so far this one is mine, though I have a long way to go to make everything in the book (just give me some time, I’ll get there!)

Ingredients:

  • 1 large butternut squash, peeled and cut into ~1x3in chunks
  • 1 large red onion, cut into wedges that will fall apart in the oven
  • 1.5 Tbsp lemon juice
  • 3.5 Tbsp tahini
  • 3 Tbsp water
  • 1 garlic clove, crushed
  • 3 Tbsp pine nuts
  • 1 Tbsp Za’atar (http://en.wikipedia.org/wiki/Za%27atar)
  • 2-3 Tbsp chopped parsley
  • Olive oil

1. Preheat the oven to 475. Toss the squash and onion in a large bowl with olive oil and a sprinkle of salt. Spread the veggies out in 1 layer on a baking pan and bake in the oven until they start to brown on top (careful with the onion! They may go first.) ~40-50 min. Let them cool.

2. Toast the pine nuts in a skillet with olive oil on high heat, moving them around until they start to turn ever-so-slightly brown.

3. Make the sauce: whisk together the tahini, lemon juice, garlic, and a pinch of salt.


Image

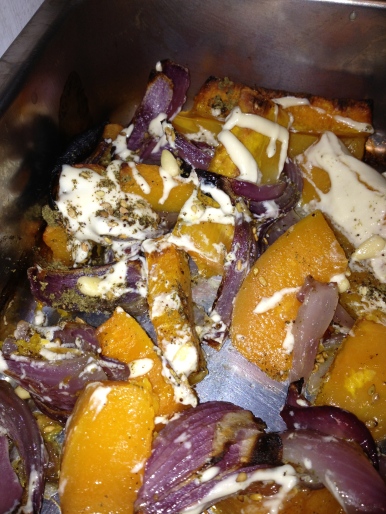
4. Sprinkle the pine nuts and drizzle the sauce over the squash and onions. Then sprinkle the za’atar and parsley over everything. Season with salt and pepper to taste.

Image

Quinoa with Lemon and Radish Leaves

What a month. Renovating, packing, moving, and disasters here at home, and around the world. Everything has been feeling a bit frenetic and all mixed up. For me, it has been a month of perspective taking: remembering that what’s really important is what I have in front of me: a husband I adore, family, friends, and a way to make a living in a field I believe in. The rest is just details–sometimes I just need to remind myself of that more frequently.

One nice thing we’ve done recently is plant a garden in the little raised bed behind our new house. We started with lettuce, arugula, and radishes, and I look forward to adding more. Because my years being forced to weed my mother’s garden and my casual coming and going from the Dartmouth Organic Farm apparently did little to instill actual gardening skills in me, I planted way too much of all of the seed. Now that the glorious spring has erupted here in Tennessee, the plants are going gangbusters. So, the other day I tried to thin them out (after having done battle with cat shit–we have a huge population of feral cats in the hood. Side note for gardeners: if you put a grid of chicken wire right on top of the dirt, cats won’t use your garden as a litter box, which is a good thing, since their “fertilizer” is actually really dangerous). I was left with a really cute pile of radish greens, which I did not want to compost because a) they looked so fresh and delicious and b) because we literally had no veggies in the fridge. Thus, this simple recipe was born of desperation, deep gratitude for spring, sun, and life, and things that I had in my cabinet.

I recommend adding protein by plopping a poached egg on top. We had ours with a butter bean and beet salad (canned butter beans, leftover roasted beets, lemon juice, olive oil, salt, and pepper). The dukkah (read more on this amazing Egyptian spice in the link below) really adds a little pizazz, so I strongly encourage you to make some (or apparently Trader Joe’s carries it too…).

Quinoa with Lemon

Quinoa with Lemon and Radish Leaves

  • 1.5 C. quinoa
  • 1 lemon, zested and juiced
  • bunch of radish leaves (or other young green leaves: spinach, chard, etc.), chopped coarsely
  • 3 Tb. olive oil
  • 1/4 C. feta cheese, crumbled
  • 3 green onions, chopped
  • Chopped almonds or a few Tb. of dukkah (promise I’ll post a recipe soon!)

Bring a pot of salted water to a boil and add the quinoa. Combine the lemon juice, zest, and olive oil together. When the quinoa has boiled for 15 minutes, drain well in a fine mesh strainer and toss with the dressing, and plenty of salt and pepper. Toss in the chopped greens, feta, and green onions and serve warm or room temperature, garnished with some nuts or dukkah. Add a poached egg on top for some delicious protein.

Savta’s Sambusek

This was probably the #1 signature dish of my paternal grandmother, Savta. Actually, it probably only garnered that level of superiority for the grandkids, who were less interested in her flavorful vegetable dishes like stewed okra, and traditional Arab roast chicken with rice (tbit) that seemed to enthrall the adults. Just a smell of these little fried packets of salty chickpea mush was enough to expand our little bellies to accommodate a quantity of food that was utterly shocking to our relatives, and probably garnered images of the rumored plenty in America that contrasted starkly with their own childhood memories of living in a small Iraqui immigrant community in the early years of the state of Israel.

Savta was not a woman of recipes. She never really learned to read, and preparing food to her was as automatic an activity as getting dressed in the morning. So when my mom and I decided to start making sambusek on our own, we were thrilled to have a videotape of the three of us making it together from when I was probably 6 or 7 years old. From that we gleaned approximate proportions and ingredients, and remembered the special way Savta used to prepare food – enjoying the feeling of the food in her hands, the smells filling the house, the banter between women, and the traditional preparations that had brought together and nourished her family and community for generations.

I thought making this dish for Aya and Kileken in Basel would be a nice hommage to Savta and the togetherness that her food always inspired. It made a great centerpiece for a middle eastern meal with Israeli salad and babaganouj. Though Savta always fried her Sambusek (which is the traditional way its made) my mom and I both opt for the healthier and less messy option of baking them. Either way is deeeeelish though, so try whichever way you please!

Savta’s Sambusek

Ingredients:

  • 2 C flour
  • 1 C chickpea cooking liquid (or can liquid if using canned)
  • 3/4  C dried or 1 can canned chickpeas
  • 1 large onion
  • 2 tbsp cumin – half seeds,  half ground if you have seeds
  • 1 tbsp chicken powder (bullion or other)
  • ¼ C Extra virgin olive oil
  • Salt and lots of freshly ground pepper

If using dried chick peas, soak ~12 hours with a tsp of baking soda. Drain and rinse the beans, then boil them in water for ~1 hour or until soft. Retain the water for the dough.

If using canned chick peas, drain well, retaining the liquid for the dough. Rinse the chick peas once drained.

Turn the oven on to ~350 and grease a large cookie sheet. Start out by frying the cumin seeds in a small amount of oil for a few min. Once they start to get darker, they can be crushed with a mortar and pestle and returned to the skillet, or just left as is. Add the onion and fry in plenty of oil until they start to carmelize – at least 15 minutes.

Puree the chickpeas, not too fine though. Add to the skillet with the onions and cumin. Add chicken powder, ground cumin, and seasoning and let the mixture heat up and soften further, another 5ish minutes. Then blend the whole thing until the mix is a kind of chunky thick paste. Use lots of olive oil. And I mean lots.

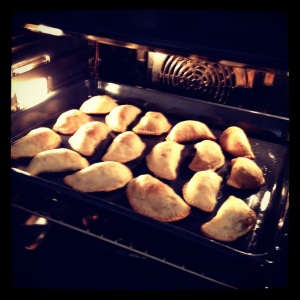
To make the patties, add the flour and chick pea water together, with some extra pepper and cumin (lets say around a teaspoon each and a pinch of salt. Knead until smooth and sticky. Roll out until ~ 1/8 -1/4 in thick. Cut into rounds about three inches in diameter, and dab a heaping spoonful of chickpea mix into the middle. Fold in half and secure the edges by pressing down with a fork. Place on the oiled cookie sheet, and paint the tops of the sambusek with olive oil. Bake in the oven ~30 minutes or until the crusts are golden.

Meditations on snacking

You should definitely give a guy you just met your number if one of your first conversations includes popcorn.

I know from experience.  Because not only is it a strong indicator of his quality as a person –in many scientific studies, it has been proven that preference for popcorn is highly correlated with being kind, funny, a subscriber to Scientific Mind, and a really good bowler — there is also a high probability that if said guy sticks around in your life, he will make you delicious stove-top popcorn on the reg.  None of this microwave business.  And stove-top popcorn is the tops in evening snacking.  Especially if you don’t have to lift a finger to make it appear.

Image

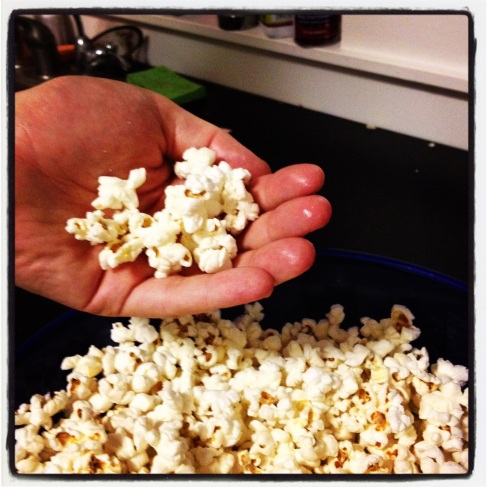
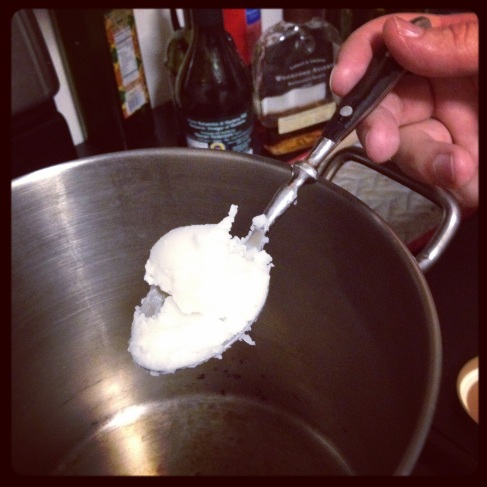
Popcorn just got elevated to a new level a few nights ago when we experimented with coconut oil.  You nutritionally minded types will know more, but I’m under the impression that it’s one of those “good fats.”  It’s also fun to cook with because it’s solid at room temperature, so it looks like you’re buying a jar full of wax.  But then that waxy stuff melts and cooks your popcorn and it ends up infused with a light and nutty flavor.  I can’t explain WHY it tasted so much better than the stuff popped with the usual canola oil.  But trust me, it did.

Make this happen some night soon.

Coconut Oil Stove-Top Popcorn

Scoop coconut oil into a large pot (use 1 T of coconut oil for every 1/4 cup of popcorn you intend to make.) See?  It’s waxy looking (p.s. Cat, check out the Woodford Bourbon in the background…mmmmmmm)

Image

Heat the burner to medium-high heat.  The coconut oil should start melting.  Place a few kernels in the pot as testers.  When you hear one pop, add the rest of the popcorn kernels and put a lid on the pot.  You can shake it a little, but it’s no big deal if you don’t.  Popping will pick up big time.  When the popping slows (1-2 seconds apart) take it off the heat and immediately transfer to a bowl.

We then melted a little more coconut oil in the still-hot pot and tossed it on top of the popcorn along with a healthy pinch of salt.  Perfection.

Kohlrabi Chips

I know what some of our readers might be thinking: what the f*&$^#! is kohlrabi? Good question. The name is a combination of the German words for cabbage (“kohl”) and turnip (“rübe“) as the vegetable consists of a dense bulb resembling the former, and stems that look like turnip greens. It is a versatile vegetable that can be used for a number of purposes, including salads, stir fries, and extra friends for your next dance party:

Aya discovered a recipe for kohlrabi fries on the NYT website recently, and we decided to change it up a bit for the fry’s cooler, crispier and slightly more low-key cousin: the chip. Enter mandoline slicer… In order to achieve “chip” and not “matchstick”, we had to remove this little removable piece from the device. After 45 minutes and 3 separate rounds of attempts by 3 ivy leaguers, we finally managed to accomplish this monumental task.

Phew! Glad That’s behind us. Now, for the recipe:

Kohlrabi Chips

  • Kohlrabi
  • Grapeseed oil
  • Paprika or other preferred seasoning
  • Salt

Set the oven to 500. Heat a baking sheet with the bottom coated in grapeseed oil. Slice the kohlrabi thin, preferably with a mandoline slicer. Take out the hot baking sheet and add the slices, brushing the tops with oil. Cooking time… eh. Not really sure. And ovens in Europe have different settings with fans and whatnot. So pretty much just watch until they’re starting to brown, flip, and continue until they look golden.

How we would do it differently next time: In reality, the chips turned out quite burned on the edges, and undercooked in the middle. Or some were just burned throughout. Our conclusion was that our method was not ideal, and we should have just done it exactly how the NYT suggested in the first place. So if you’re going to actually make it, please ignore this post and follow this recipe. Mmk thanks.

Arepas

I’m a huge fan of all things corn: grits, corn on the cob, polenta, you name it. Maybe it’s my Southern heritage, but there’s something earthy, simple, and comforting about corn products (well, with the exception of corn syrup…).

Recently our friend Javier turned us on to homemade tortillas. I always thought that they would be impossible to make, but with a tortilla press, they really are quite easy, and he walked us through the process several times. Even so, I don’t always feel like dragging out the tortilla press, and I’m still working on making them the perfect thickness.

Last night, after much travel, I looked in our fridge and found there was little there. I managed to scrounge together a bean stew, but we both felt like something corny on the side, like cornbread. Unfortunately, a lack of milk and eggs made that impossible, but we did have some masa harina. I figured one of my favorite recipe search engines, foodily.com, could help me find something to make out of our lone bag of masa harina.

Fortunately, we were in luck–one of the first recipes that came up was for arepas–a Venezuelan sort of corn flatbread or thick tortilla. And the ingredients?: masa harina, water, and salt. How easy is that? I first came across arepas in college, when I lived in New York City for a term, not too far from Caracas Arepas Bar where they stuffed the corn circles with delicious meat and vegetarian fillings. They were cheap, nourishing, and delicious, so it was great to come across a recipe for them. We also don’t eat a lot of bread in the house, but I sometimes crave some vehicle for the many vegetarian bean dips or stews that we so often eat, and so these seemed liked a perfect thing to introduce into our repertoire.

Within about 15 minutes from start to finish, we had a plate full of hot arepas to accompany our bean stew. We had them plain, and for me, slathered with butter, but they would be great stuffed or topped with avocado and lime, ceviche, refried beans and toppings, or grilled meat or seafood. I was impressed at how quickly these came together and I think they will become a staple in our home.

Arepas

adapted from Big Girls Small Kitchen, makes 8 small arepas

  • 1 1/2 C. masa harina
  • 1 tsp. salt
  • about 1 1/3 C. water
  • oil or cooking spray

Using a fork or a whisk, combine the masa harina and salt well. Add in about 1 C. of the water to the masa harina and salt mixture and combine with hands. Add enough water until the dough comes together and is about the texture of playdough. Divide the dough in half, and divide each half into fourths, rolling them in your hands to make 8 little balls of dough. Flatten each of the 8 dough balls into flat discs. Heat a cast iron skillet on the stove and add a thin film of oil or cooking spray. When the pan is hot, add the dough discs in batches. Flatten the discs with a spatula. Cook over medium high for about 5 minutes on the first side, or until golden and with black spots across the bottom. Flip, flatten the discs again, and cook for about 5 minutes or until both sides are perfectly charred. Serve immediately while hot, or keep them warm in a warm oven.

Don’t keep the uncooked dough for too long before frying, as it will dry out and become crumbly quite easily. If you need to keep it after you make it, keep the dough balls in a bowl and cover with a damp kitchen towel. These should be about 1/2″ thick, but don’t make them much thicker, and remember to flatten them with a spatula so that they cook through. The outsides should be crispy with a tender, but not doughy, center.

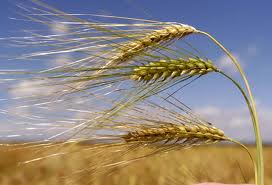
Barley – its the new pomegranate juice.

In this post I will provide a recipe, pictures, and… unsolicited advice! That being that you should all cook barley at least once a week and consume it in large quantities. For several reasons:

1. Its just about the healthiest grain out there. It has the lowest glycemic index of any grain including cous cous, rice (even brown), whole grain breads, and of course pasta. Its SO low, in fact, that the only other foods in its category are pretty much beans. This means that it takes a long time to break down the carbohydrates in barley, and hence it causes your blood sugar to rise very little (so you have less conversion to fat.)

2. It has lots of fiber. This means you feel full when you eat it – much more than with pasta or rice. It also is good for your GI tract – it helps to prevent constipation.

3. It has iron, niacin, thiamine, and lots of other healthy tidbits.

4. It has a nice, fluffy texture and goes well with all kinds of delish combinations of sauces, spices, veggies, meats, and more!

I’ve been improvising a lot lately with whatever stuff I happen to have in the kitchen. I’ve even used leftover plain barley for breakfast with a fried egg on top. Yum!

Here’s a recipe I made the other night that was largely inspired by Sara’s brussel sprouts post. It made a great one-dish dinner and was just as delicious left over two days later.

Ingredients:

Olive oil

1 cup dry pearled barley

2-3 cups chunks of squash (any kind – I used butternut)

4 scallions

10-15 brussel sprouts cut in halves

1-2 cups mixed mushrooms

2 tbsp date syrup (this is what I found in my parents’ kitchen, but I’m sure maple syrup would work just as well)

3 tbsp balsamic vinegar

Goat cheese – eh, lets say about half one of those small logs from Whole Foods

Pepper to season

Directions:

1. Turn on the oven to 350. Boil a pot of water, add barley, let simmer ~45 minutes, or until soft.

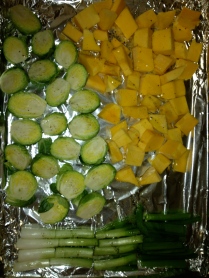
2. Toss brussel sprouts, squash and green onions in olive oil and place on a cookie sheet. Bake at 350 for about 40 minutes or until just starting to brown.

3. Sautee mushrooms until soft, ~4 min. Add the syrup and balsamic vinegar to the mushrooms.

4. In a large bowl, mix the barley, roast veggies, and mushrooms. Add goat cheese, either decoratively on top, or mixed in. Season to taste.